
Enhance user account security with 2-step authentication Two-Factor Authentication (2FA)
-
How to Setup Two-Factor Authentication (2FA) on Channel Manager
-
How to Set Up Two-Factor Authentication (2FA) on Intel Cloud PMS & Booking Engine
*Before setting up 2FA, ensure that you have the Google Authenticator app installed on your mobile device.
the following installation instructions refer to the Google Authenticator app for Android.
For instructions on installing Google Authenticator on iOS devices, or instructions for installing the app on multiple devices, see the “Install Google Authenticator” Support Article.
-
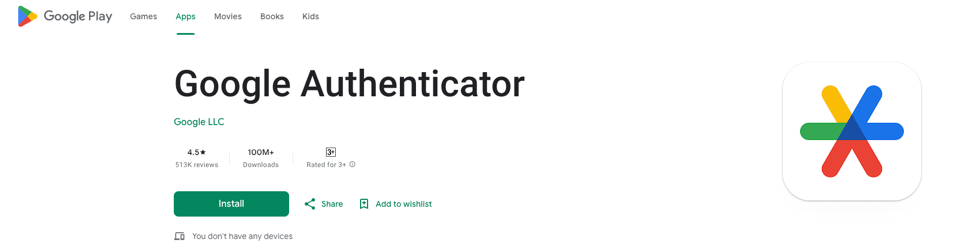
Go to the Google Play (or Apple) store and search for "Google Authenticator", then install the app.

Click to download

Click to download
-
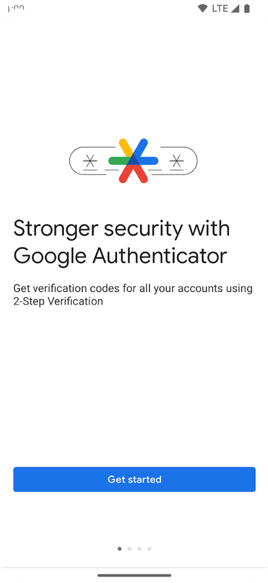
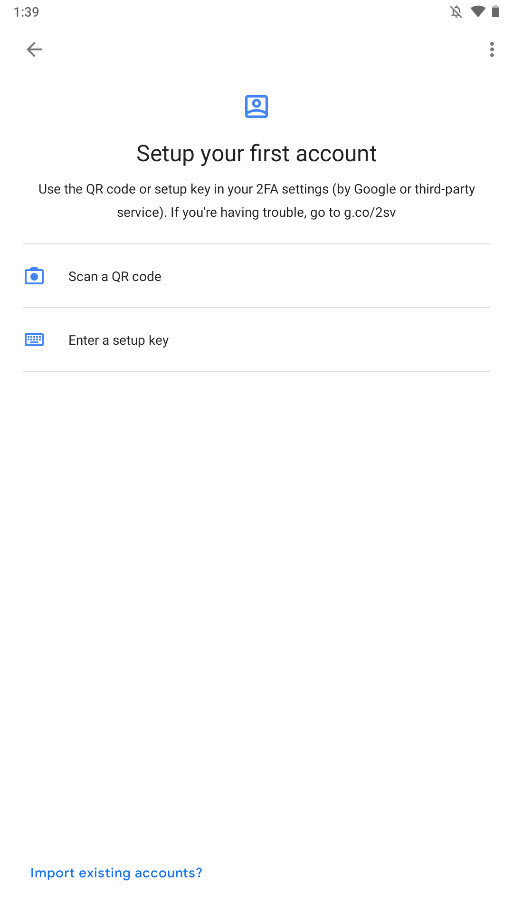
Once installed, open the Google Authenticator app and tap “Get started”.
How to Setup Two-Factor Authentication (2FA) on Channel Manager
-
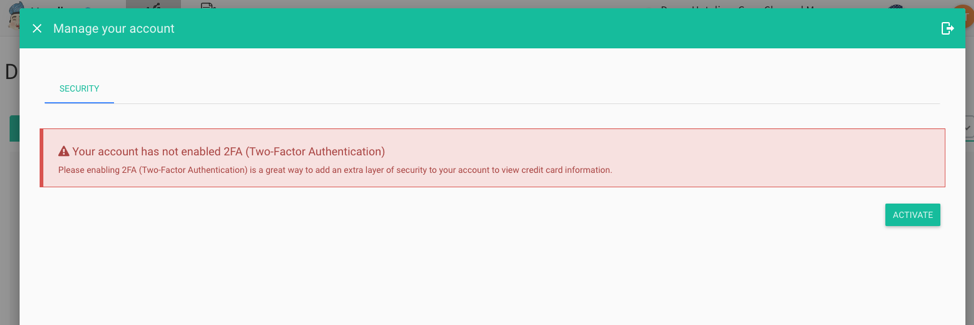
Tab “ACTIVATE”.
-
Display “QR code” and “Secret Key”.
*Please back up your secret key on paper and keep in a safe place, this will help you in case of loss off device.
Setup Two-Factor Authentication (2FA) on Google Authenticator
-
Setup with QR Code
- Tab “Scan a QR code” and scan QR on Channel Manager Two-Factor Authentication (2FA), Then tab “ADD ACCOUNT”
-
Setup with Secret Key
- If your device is not able to scan the barcode, Tab “Enter a setup key”.
- In the "Account name" field, give the authentication a name
- In the "Enter your key" field, give the Secret Key from the Channel Manager Two-Factor Authentication (2FA) setup screen, then tap the "ADD" button.

Completing Two-Factor Authentication (2FA)
-
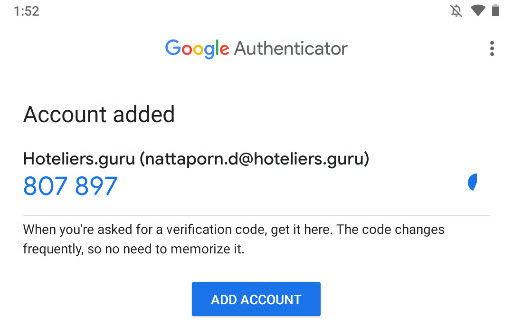
Whether you have added a Google Authenticator account using the barcode method or the manual method, Google Authenticator will provide you with a 6-digit numeric code that is generated every minute.
-
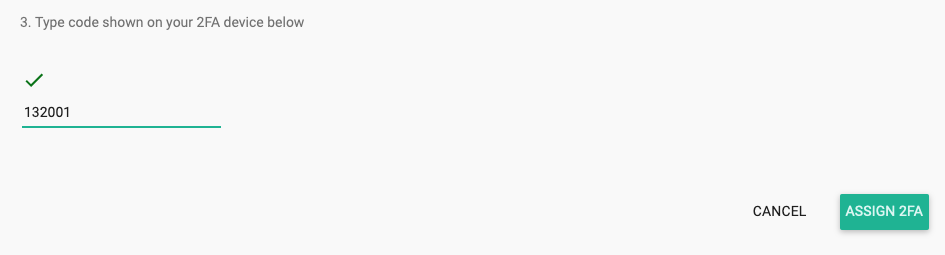
Enter the number that you see into the "6-digit verification code" field then click the “ASSIGN 2FA" button.

How to Set Up Two-Factor Authentication (2FA) on Intel Cloud PMS & Booking Engine
-
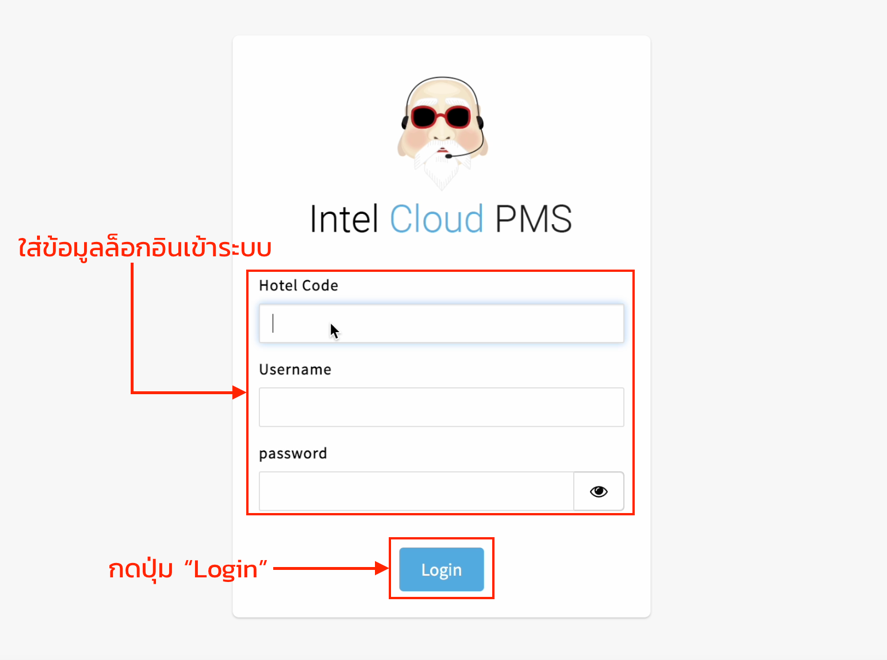
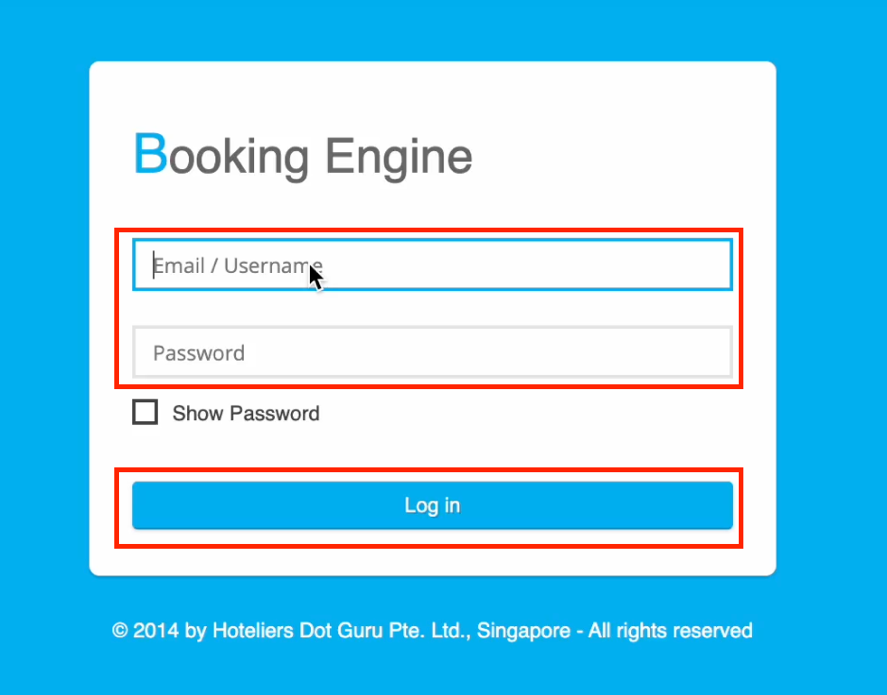
Enter login information on Intel Cloud PMS or Booking Engine
-
Click “Login” button
Intel Cloud PMS
*Users who log into the system (Super Admin) using email must have 2FA enabled.
Booking Engine
-
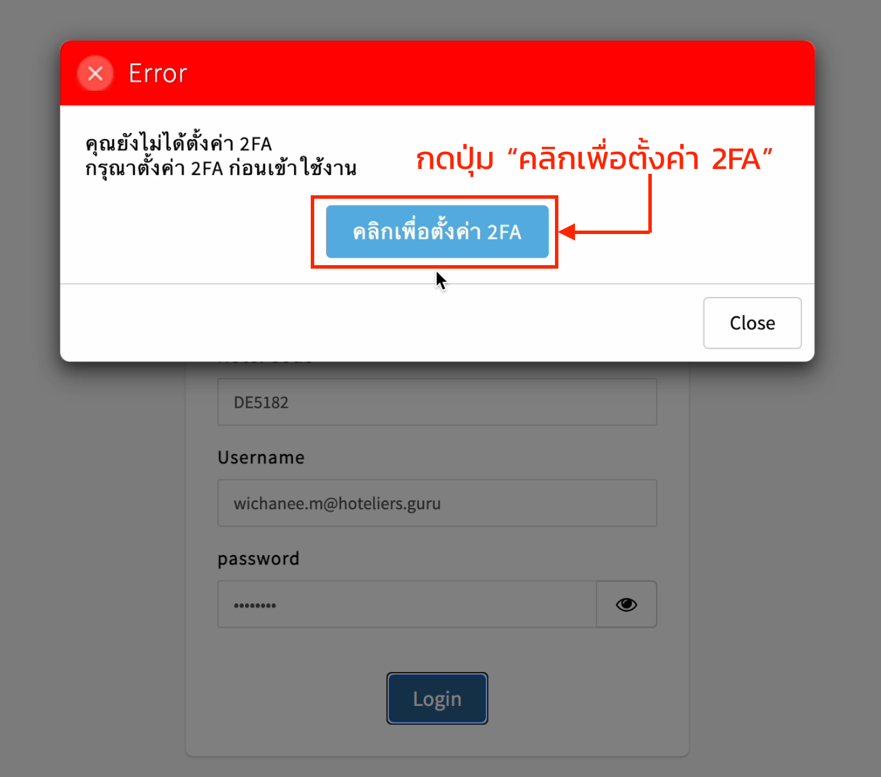
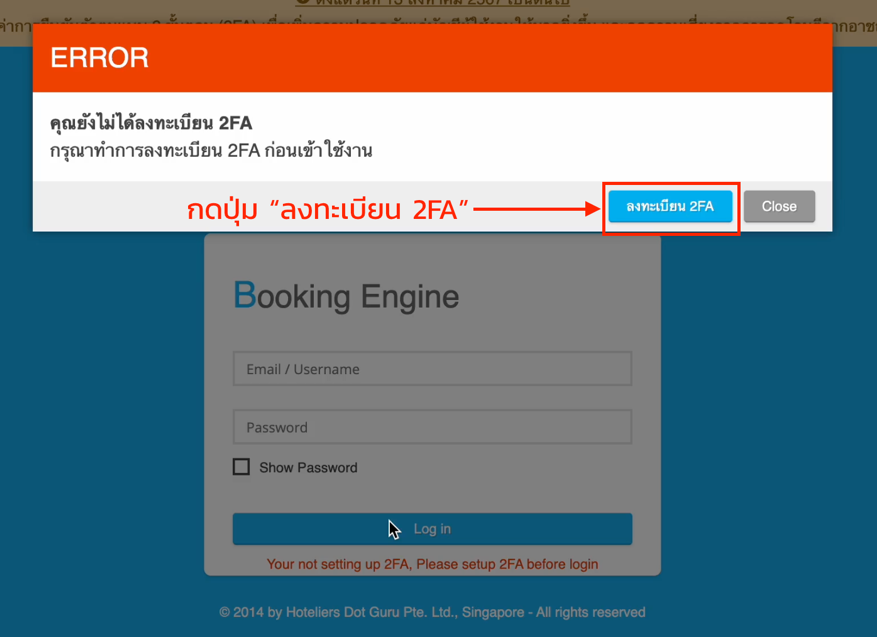
The system will display a pop up for you to enable 2FA. Click the button. “Click to set up 2FA”
Intel Cloud PMS
Booking Engine
-
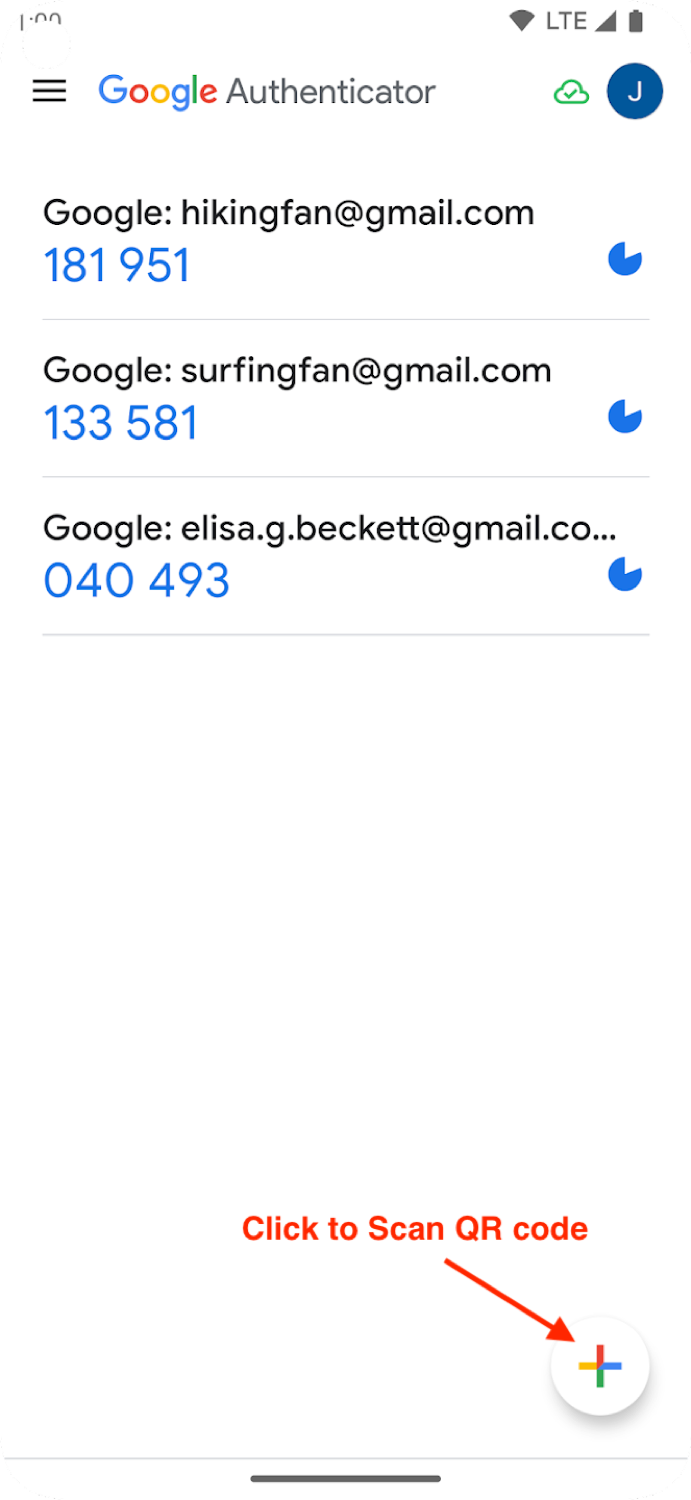
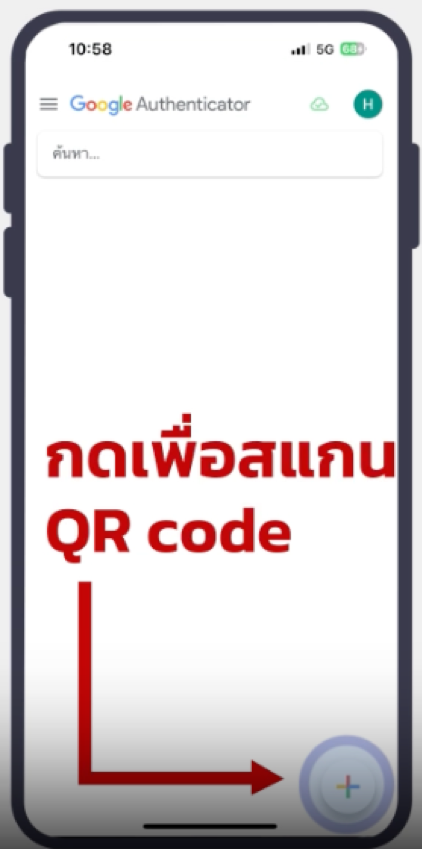
Open the Google Authenticator application. Then press the plus sign (+).
-
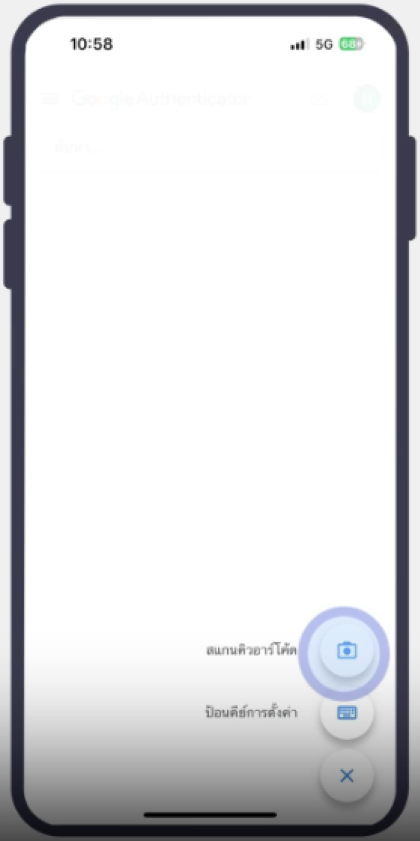
Select “Scan QR Code”
-
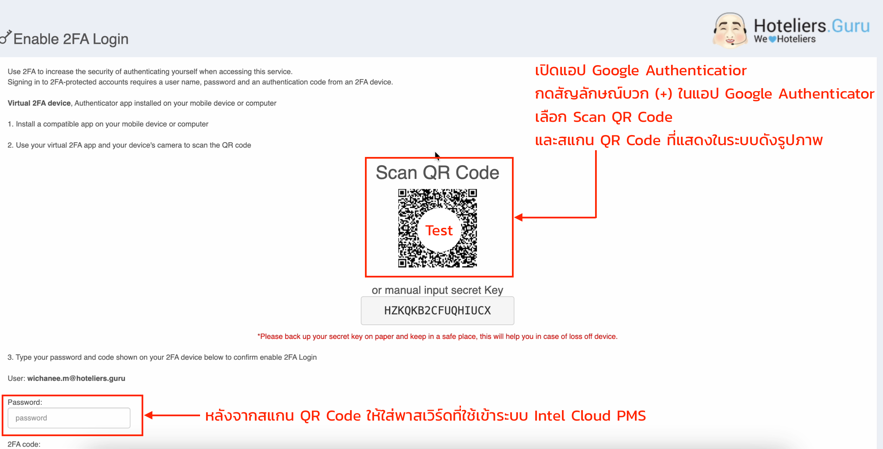
Scan the QR code displayed in the system.
-
Enter your password to log into the Intel Cloud PMS or Booking Engine system.
-
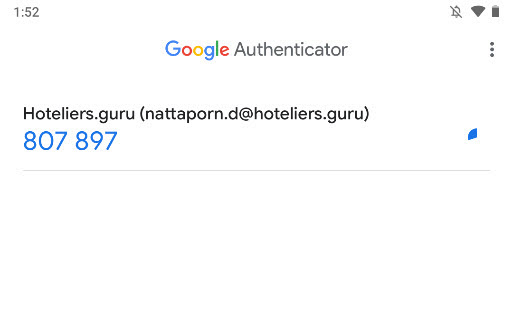
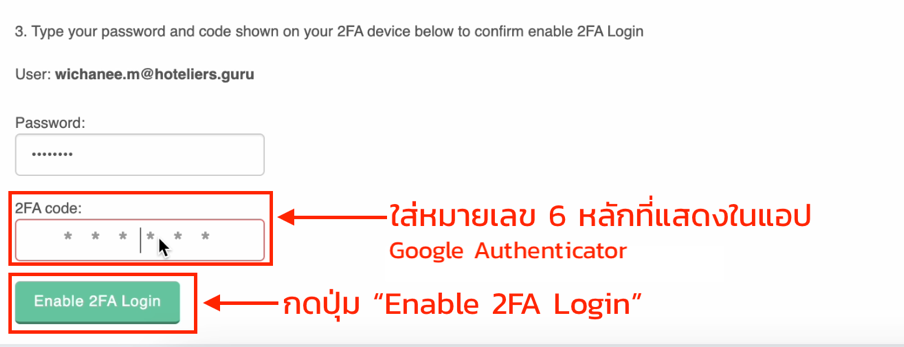
Enter the 6-digit 2FA number displayed in the Google Authenticator application.
-
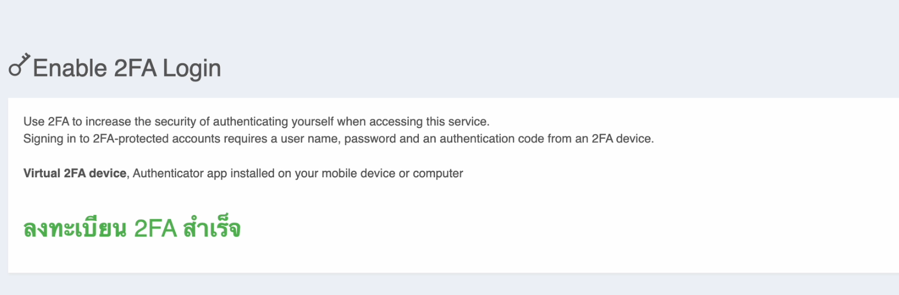
Click “Enable 2FA Login” button
-
When the information is entered correctly, the system will display the message “2FA registration successful”.
-
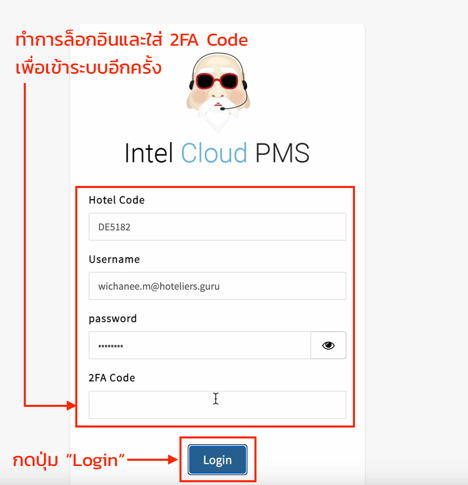
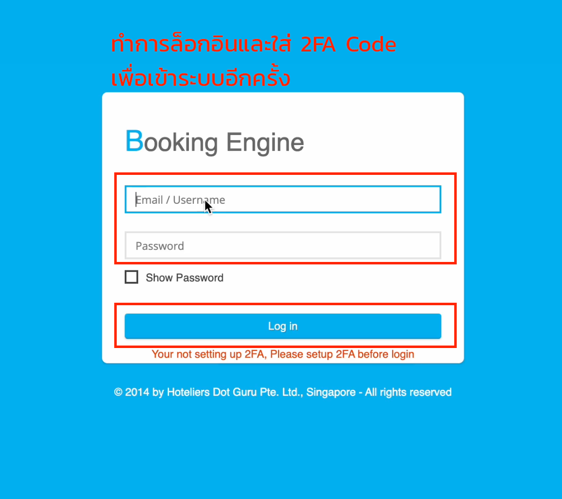
After that, enter your login information into the Intel Cloud PMS or Booking Engine system again. The system will display a 2FA Code field for the hotel to open the Google Authenticator application and enter the 6-digit 2FA number displayed on the Google Authenticator application.
-
Click “Login”
- If you have 2FA installed, you should not delete the Google Authenticator application unnecessarily. Otherwise, your 2FA code may be lost and you will need to contact our Support Team to request 2FA deactivation. You will also need to enable 2FA in the Google application. Authenticator again
- After activating 2FA, you will need to enter the 2FA code every time you log in to the system.
- The 2FA code changes every 30 seconds, so you can enter your 2FA number within 30 seconds. When you change your 2FA number, you just need to enter the new 2FA number into the system.
- For those using the Intel Cloud PMS and Booking Engine systems, once you enable 2FA in the Intel Could PMS or Booking Engine system, you do not need to enable 2FA in the other system because both systems are under the same 2FA and Username Account.

Thailand Office : Hoteliers Dot Guru (Thailand) Co.,
Ltd
29 Phang Nga Rd., Talad Yai, Phuket, 83000 Thailand
Tel : +66 76 355 356
Mobile : +66
9 5076 0570
Contact Us : support@hoteliers.guru
Website : https://www.hoteliers.guru
![]()
![]()
![]()